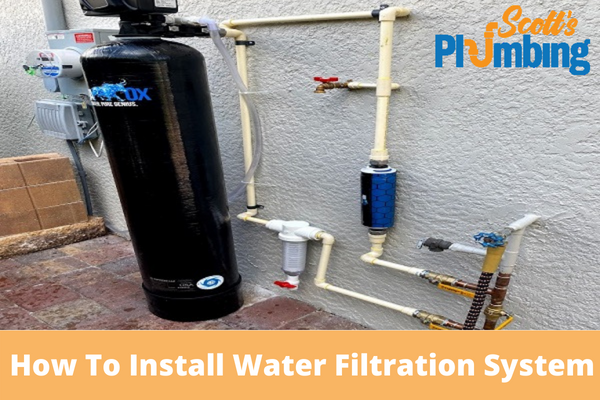
Whole-house water filters have been trusted and recognized by people since their introduction as critical equipment that can ensure drinking water’s safety, health, non-toxicity, and harmlessness in family life. Its installation is frequently more complicated and involves more steps. Aside from techniques, you must also be patient and install them step by step.
Steps In Installing A Whole-House Water Filter
Step 1: Preparation For Installation
Preparatory work entails preparing the tools used during the installation process before installing the whole house sediment filter.
When installing a whole-house water filtration system, you should first contact a water filter store professional to conduct an on-site survey to determine the water inlet bus of the water pipe.
Step 2: Determine The Location
The pre-filter is typically installed close to the water meter and main valve, with the floor drain, sewage pipeline, and power supply reserved. Heat sources and direct sunlight should be avoided in the corresponding facilities.
If the filter is too close to a water heater, it should be equipped with a check valve. An ideal location for central water purification would be surveyed before installation of the whole house system begins—a spot where both fresh water and drainage are available.
Step 3: Put The Pre-Filter In Place
The pre-filter is the most critical process in the whole-house water purification system. It can remove large particles from tap water and sediment, and rust. The pre-filter is typically installed in place of the main valve or the inlet pipe’s water meter.
When installing water and electricity, the wiring must be laid out so that the water outlet and power cord can be reserved. It will be more challenging to wire if it is done after the decoration.
Step 4: Install The Whole-House Water Filter’s Central Water Filter
To facilitate overall wiring, the central water purifier is typically installed under the sink or sink in the kitchen. The primary water filter’s function is to purify the water throughout the house, filter the water out of the pre-filter, and perform the second step. Secondary filtration can remove heavy metals, chlorine, bacteria, and other organic and chemical contaminants from water.
Step 5: Install A Water Softener For Your Whole-House Water Filter
The installation parts of the central water softener and the water filter are the same, but the water softener is classified as upper or lower. When the pump is turned on, the water supply must be connected. Before installing the filter, you should install a power connection board beneath your cabinet.
Step 6: Checking For Leaks And Flushing
After the installation is complete, open the main household water valve to check for leaks in the pipeline while manually forward and reverse flushing the water filter.
Finally, turn on the water filter, open the main tap water valve, check the connections of each pipeline, and ensure that the whole house water filter can be used commonly.
Final Thoughts
Installing a water filter system can be difficult, requiring a solid understanding of plumbing and the system you intend to install. You should also consider how to maintain the system and grant yourself access to perform routine maintenance.
As a result, it is advised that you have a professional install your water filter system. If you’re unsure what to look for in a water filter, call Scott’s Plumbing, and our team can help you find the best water filter for your home.


